How to Fix Broken Electronic Gadgets: A Complete DIY Guide
- Why Fix Your Electronics Yourself?
- Common Gadgets That Can Be Fixed
- Essential Tools You Need for Electronic Repair
- Steps to Repair Broken Electronics
- Common Electronic Repair Mistakes to Avoid
- When to Consider Professional Repair
- Recommended Repair Tools for Electronics
- How to Find Replacement Parts for Electronics
1. Why Fix Your Electronics Yourself?
In a world full of disposable gadgets, many people opt to throw away broken electronics rather than repair them. However, fixing your broken electronic gadgets can be both cost-effective and satisfying. When you repair your own gadgets, you not only save money on expensive repair services, but you also extend the life of your device. Plus, the skills you gain can come in handy for future repairs.
For example, a friend of mine recently saved hundreds of dollars by fixing a broken smartphone screen. Rather than paying a repair shop, they purchased a replacement screen and followed an online tutorial. The experience was not only rewarding, but it also made them feel empowered in their ability to repair their own gadgets.
2. Common Gadgets That Can Be Fixed
Several electronic gadgets are surprisingly easy to repair. If you're unsure which ones are worth fixing, here are a few that you can often repair at home:
- Smartphones: Broken screens, faulty charging ports, and battery issues.
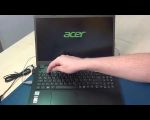
- Laptops: Hard drive replacements, RAM upgrades, and screen fixes.
- Headphones: Repairing or replacing frayed wires or faulty jacks.
- Tablets: Screen replacements, battery swaps, and button issues.
- Game Consoles: Disk drive issues, overheating problems, and HDMI port repairs.
With just a few basic tools, you can often resolve these issues yourself. You’ll be surprised at how many gadgets can be fixed without professional help.
3. Essential Tools You Need for Electronic Repair
Before you start repairing your broken gadgets, make sure you have the right tools. Here's a basic list of tools that are essential for most electronic repairs:
- Screwdrivers: Small precision screwdrivers to open up gadgets without damaging them.
- Plastic Pry Tools: These are used to open devices without scratching or breaking the casing.
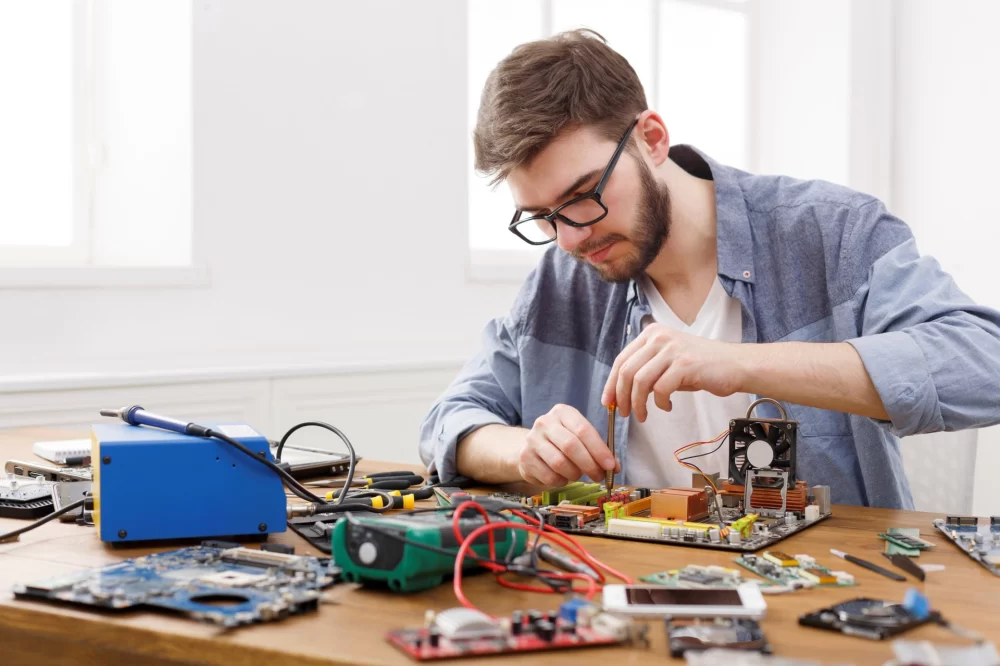
- Soldering Iron: Useful for fixing broken circuit boards or reconnecting wires.
- Multimeter: This tool helps test the electrical components of your gadgets, ensuring they are functioning properly.
- Replacement Parts: Depending on what’s broken, you'll need to have replacement parts such as screens, batteries, or charging ports.
Having these tools on hand will make your DIY repairs much smoother and safer.
4. Steps to Repair Broken Electronics
Now that you have the tools, let’s go through the general steps for fixing most electronic gadgets:
- Diagnose the Problem: Carefully inspect the gadget for visible signs of damage or malfunction.
- Disassemble the Gadget: Use your screwdrivers and pry tools to carefully open the device without damaging any internal components.
- Identify the Faulty Part: Whether it’s a broken screen, faulty battery, or damaged circuit, pinpointing the issue is crucial.
- Replace the Damaged Part: Remove the broken component and replace it with the new one. If soldering is necessary, do it with caution.
- Reassemble and Test: Put everything back together, ensuring no parts are left out. Turn on the device and test it to make sure the repair was successful.
5. Common Electronic Repair Mistakes to Avoid
Even experienced DIYers can make mistakes. Here are a few common errors to watch out for:
- Not Diagnosing Properly: Ensure that you know exactly what the problem is before you start the repair.
- Using the Wrong Tools: Using improper tools can damage your gadgets further.
- Forgetting to Disconnect Power: Always make sure your gadget is powered off before working on it to avoid electrical hazards.
By avoiding these mistakes, your repair efforts will be much more successful and safe.
6. When to Consider Professional Repair
While DIY repairs can be satisfying, there are times when it's better to call in the professionals. If the repair requires specialized tools or skills, like motherboard repair or advanced soldering, it may be best to leave it to the experts.
Additionally, if you're dealing with a high-cost gadget, the cost of a repair might exceed the value of the device itself. In such cases, consider whether a professional repair or replacement is more cost-effective.
7. Recommended Repair Tools for Electronics
Here are some of the best tools and kits available for DIY electronic repairs:
- Ninja Stik Repair Tool Kit: Offers a comprehensive range of tools for all kinds of electronics repair.
- iFixit Pro Tech Toolkit: A trusted choice for professionals and hobbyists alike.
- Hakko Soldering Iron Kit: Great for precise soldering jobs, perfect for repairing circuit boards.
If you’re serious about fixing gadgets, investing in high-quality tools will save you time and frustration in the long run.
8. How to Find Replacement Parts for Electronics
Finding the right replacement parts is crucial for a successful repair. Many online stores and platforms offer a wide selection of parts, including screens, batteries, and circuit boards. Here are a few places to look:
- Ninja Stik: A trusted source for electronic repair parts and tools.
- eBay: A marketplace for both new and used electronic parts.
- Amazon: Offers a wide range of replacement parts for most popular gadgets.
Be sure to check compatibility before purchasing any replacement parts to ensure they are the right fit for your device.