How to Clone a Hard Drive to a New One Using a Bootable USB
- 1. Why Clone a Hard Drive?
- 2. Steps to Clone Your Hard Drive Using a Bootable USB
- 3. Tools Needed for Cloning Your Hard Drive
- 4. Troubleshooting Tips When Cloning a Hard Drive
- 5. Recommended Tools for Cloning Your Hard Drive
1. Why Clone a Hard Drive?
Cloning a hard drive is an essential process for individuals who want to transfer all their files, settings, and applications from one drive to another without the hassle of reinstalling everything. It can be particularly useful when upgrading to a new drive or creating a backup for disaster recovery. With the growing importance of data security and the increasing size of hard drives, cloning allows users to save time and effort when migrating to a larger or more reliable storage solution.
2. Steps to Clone Your Hard Drive Using a Bootable USB
Cloning a hard drive to a new one using a bootable USB is a straightforward process. Here’s how you can do it:
- Step 1: Prepare Your USB Drive - Begin by creating a bootable USB drive. You’ll need a tool like Rufus or another bootable USB creator to do this. Download the cloning software and load it onto your USB drive.
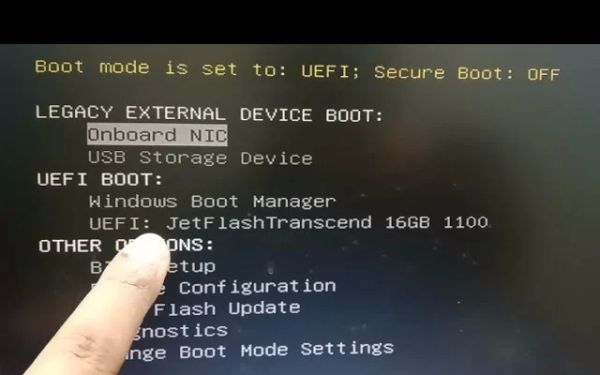
- Step 2: Boot from USB - Insert the bootable USB drive into your computer and restart the system. Enter the BIOS settings by pressing the appropriate key (usually F2 or DEL). Set the boot order to boot from the USB drive first.
- Step 3: Launch the Cloning Software - Once your computer boots from the USB, launch the cloning software. Most cloning tools will guide you through a step-by-step process to copy the contents from your old drive to the new one.
- Step 4: Select the Source and Destination Drives - Choose your old hard drive as the source and the new hard drive as the destination. Make sure the new drive has enough space to accommodate all the data from the old one.
- Step 5: Start Cloning - After reviewing your settings, initiate the cloning process. The software will copy all files, including your operating system, applications, and personal files, to the new drive.
- Step 6: Verify the Cloning Process - Once the cloning is complete, you can boot from the new hard drive to check if everything is functioning as expected. You should now have an exact replica of your old drive, but on a faster or larger storage solution.
3. Tools Needed for Cloning Your Hard Drive
To clone your hard drive to a new one using a bootable USB, you will need the following tools:
- Cloning Software: Popular cloning tools include Acronis True Image, Macrium Reflect, Clonezilla, and EaseUS Todo Backup. These programs offer free and paid versions with varying levels of functionality.
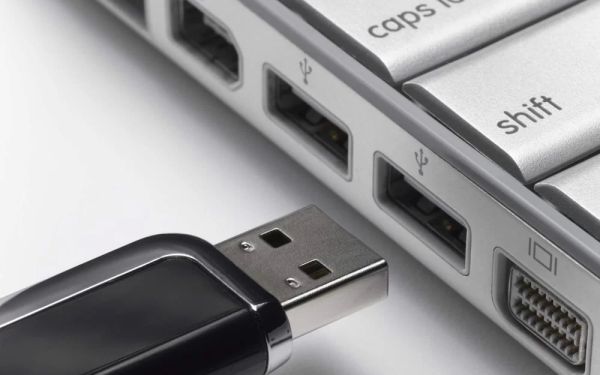
- USB Drive: A USB drive with at least 8GB of storage is required to create the bootable USB. This will hold the cloning software and allow you to boot into your system without relying on the hard drive.
- New Hard Drive: The new hard drive should be large enough to hold all the data from the source drive. Make sure it is compatible with your system (SATA, NVMe, etc.) and is properly formatted.
4. Troubleshooting Tips When Cloning a Hard Drive
Cloning a hard drive is generally a straightforward process, but sometimes you may encounter issues. Here are a few tips to troubleshoot common problems:
- Cloning Fails or Freezes: If the cloning process is interrupted or freezes, ensure that your source and destination drives are connected properly and that the cloning software is up-to-date.
- Cloning Doesn’t Boot: If your new drive doesn’t boot after cloning, check the boot order in BIOS. Ensure that the new drive is set as the primary boot device.
- Insufficient Space: If the new hard drive doesn’t have enough space for the entire contents of the old one, consider shrinking some files or transferring unnecessary data to an external drive.
5. Recommended Tools for Cloning Your Hard Drive
Here are some of the best tools for cloning your hard drive:
- Macrium Reflect: Known for its reliability, Macrium Reflect offers both free and paid versions with advanced features such as incremental backups and scheduling.
- Clonezilla: A free and open-source tool that provides a simple, no-frills method to clone hard drives. It’s ideal for advanced users who want full control over the cloning process.
- Acronis True Image: A popular paid solution that offers disk cloning along with backup and data recovery features. It’s perfect for users who want an all-in-one solution.
- EaseUS Todo Backup: A user-friendly tool that is suitable for both beginners and advanced users. It offers a straightforward cloning feature along with other backup options.